
Setting up tickets
A menu where your members pick their request, and a private channel opens to talk it through with your staff.
On this page
A ticket is a private channel between one member and your team. The member clicks a button (or picks from a menu), the bot creates the channel, and only that member and your staff can see it.
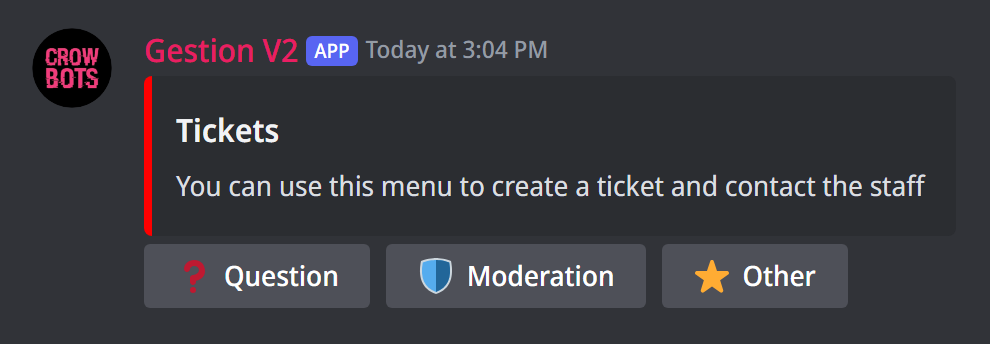
Everything is set up in a single panel, opened with the +ticket settings command. This guide walks through it in order.
In short
- Type
+ticket settings. - Pick the channel where the ticket menu should appear.
- Add your options ("Question", "Report"…) and, for each one, its category and staff roles.
- Click Validate: the menu is published.
Step 1: open the panel
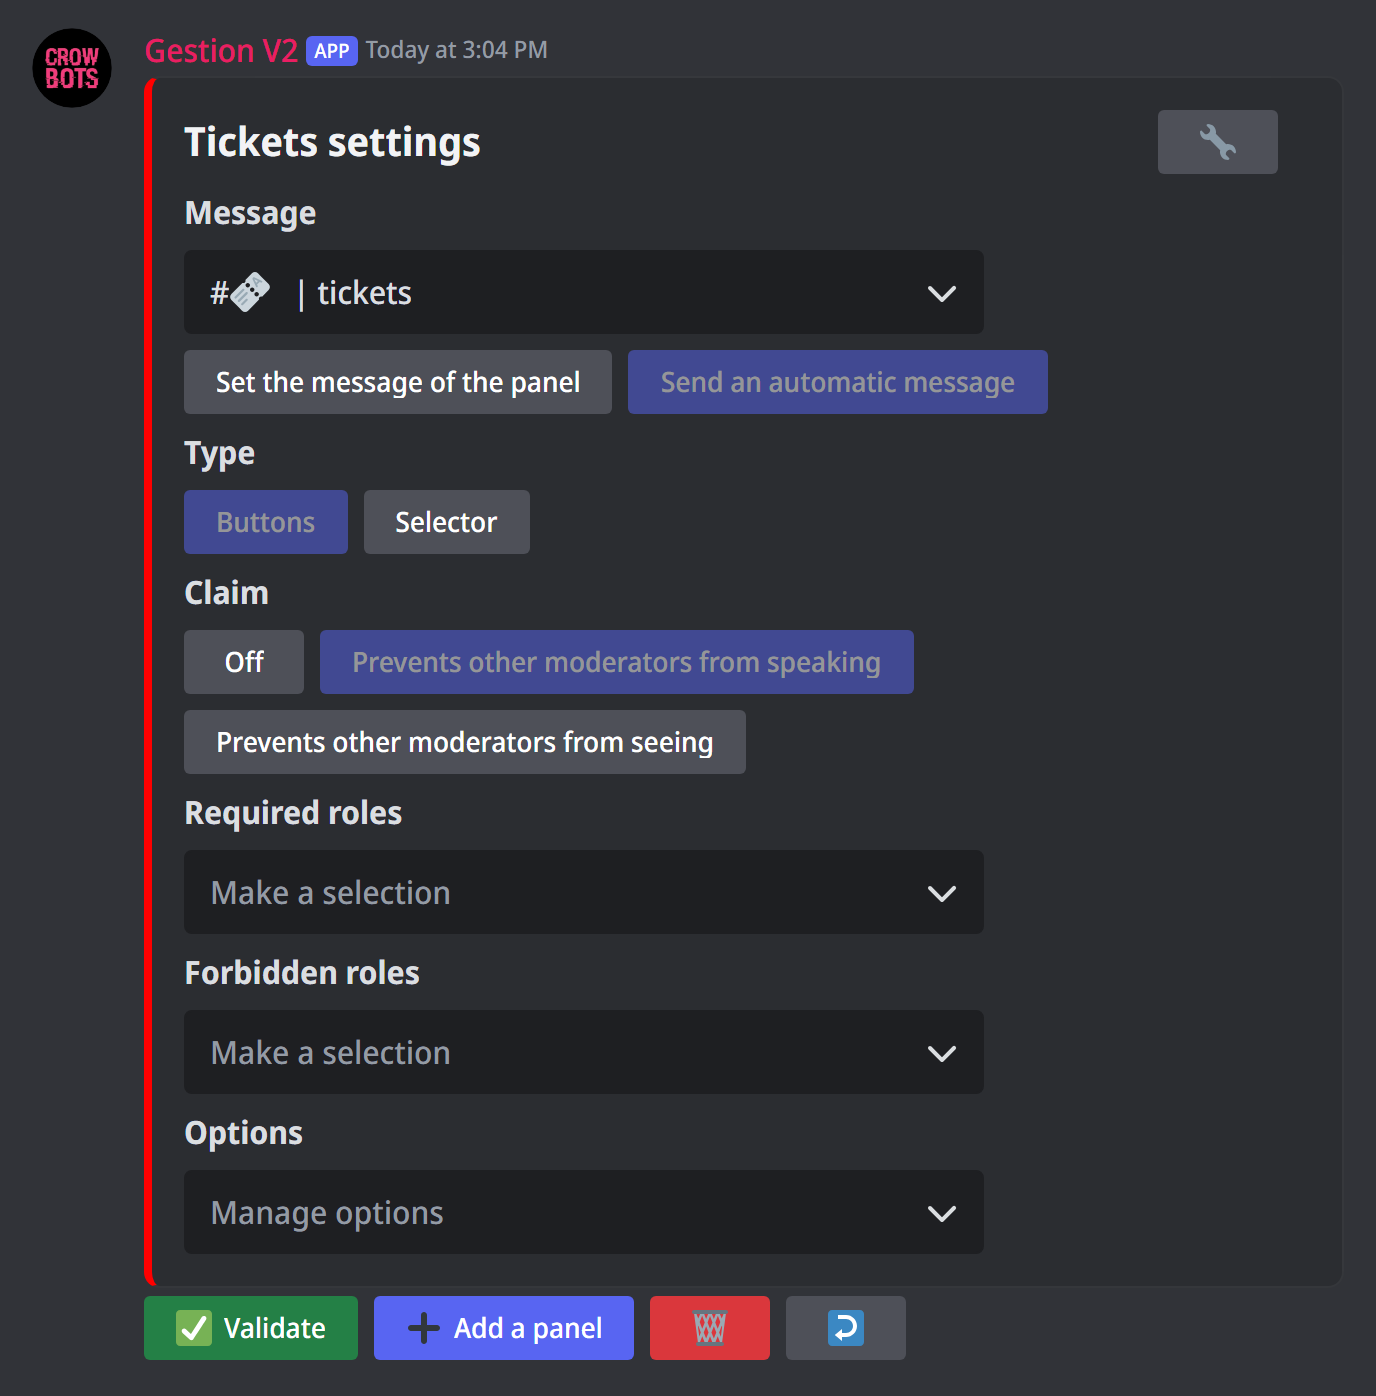
Type +ticket settings in any channel. The bot answers with the panel shown here. It only responds to you: other members cannot click it.
From top to bottom, the panel holds:
- Message: where the ticket menu will be shown;
- Type: buttons or a drop-down menu;
- Claim: what happens when a staff member takes charge of a ticket;
- Required roles and Forbidden roles: who may open a ticket;
- Options: the kinds of request your members can choose from.
Step 2: choose where the menu appears
You have two choices:
- The simplest: pick a channel from the list under Message. At the end, the bot sends a "Tickets" message there itself, with the buttons.
- For a message in your own style: first create a nice message with
+embed(title, text, picture…), copy its link (right-click the message, then Copy Message Link), then click Set the message of the panel and paste the link. The buttons are added under that message.
Good to know
The message must have been sent by your bot: Discord doesn't let a bot add buttons to someone else's message. That's why you create it with +embed.
Step 3: create the options
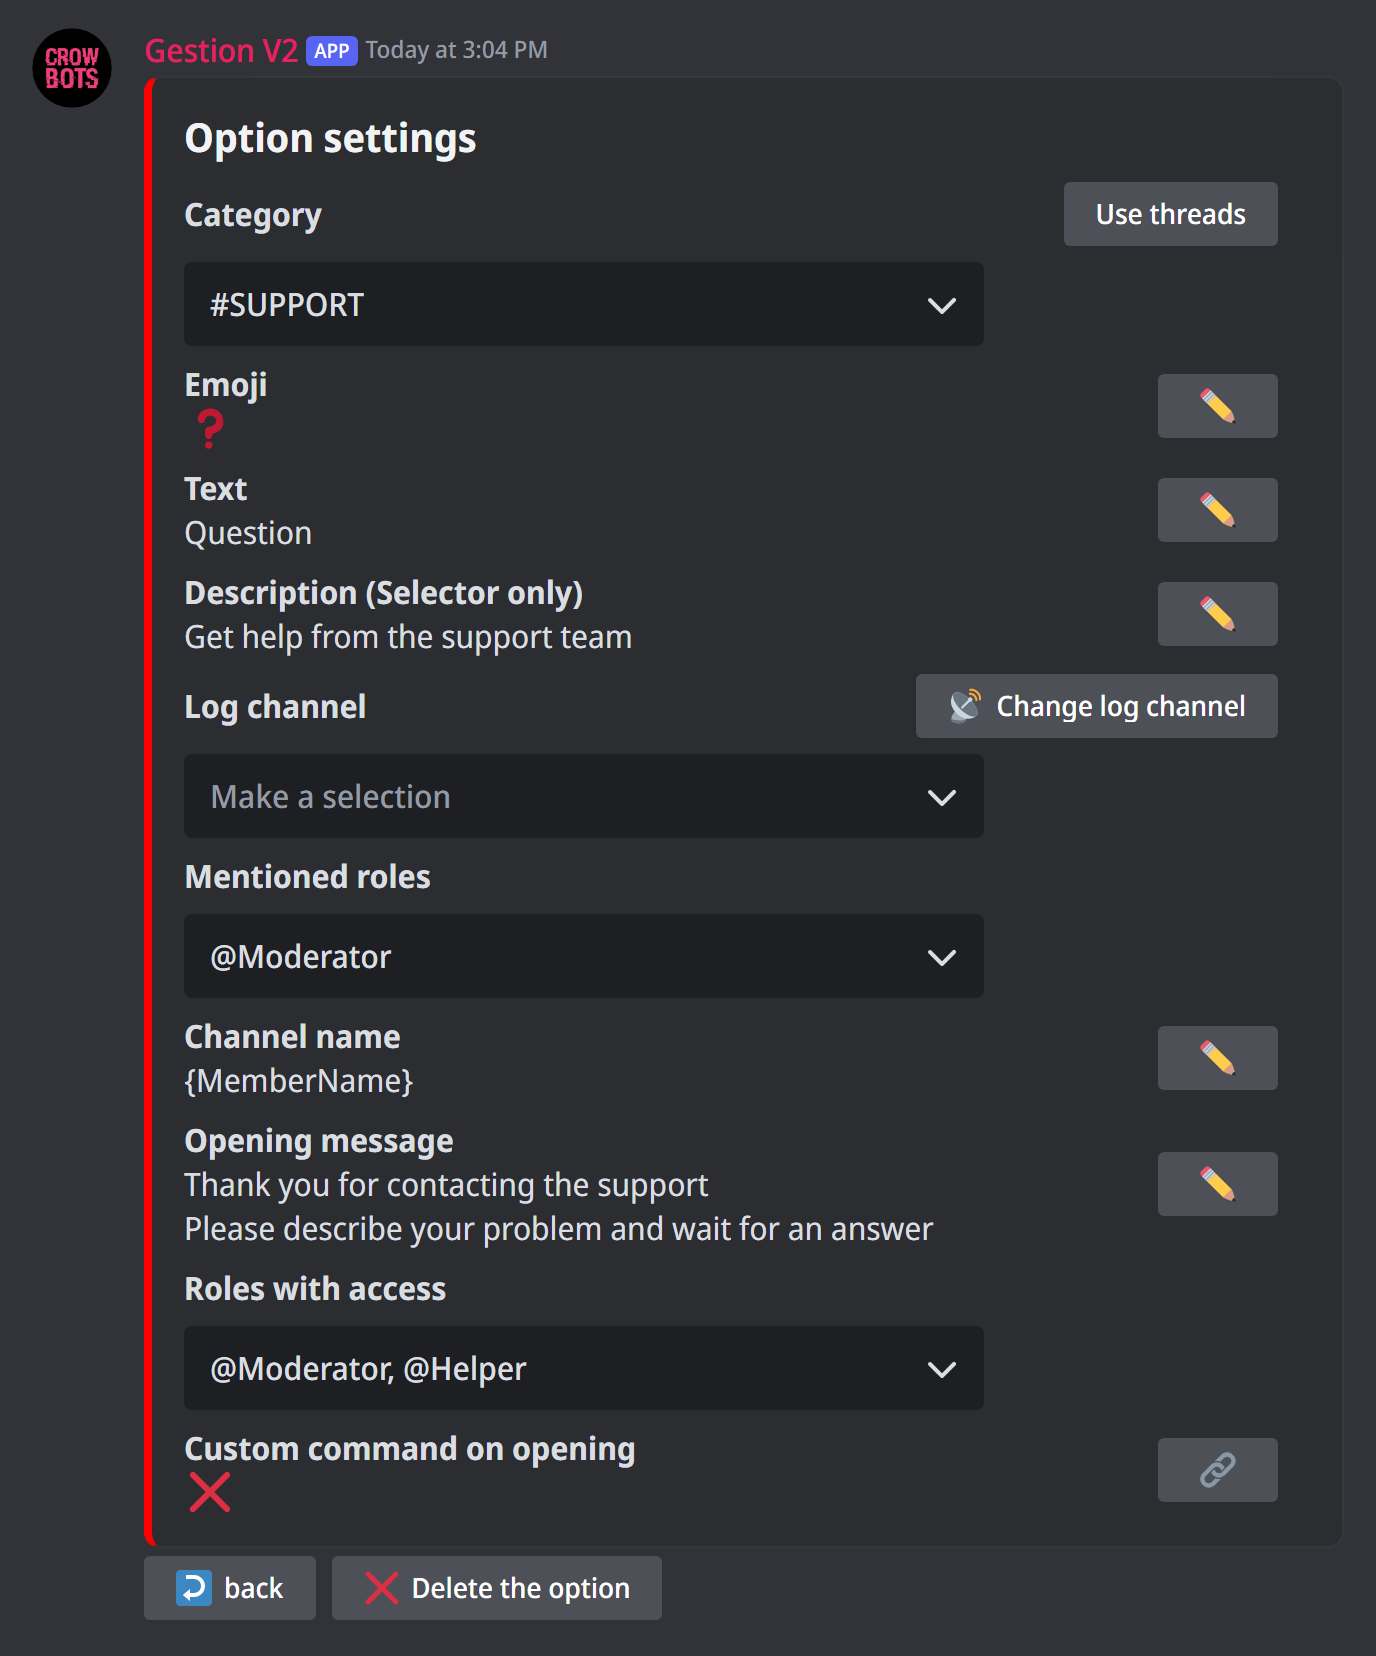
An option is a kind of request: "Question", "Report", "Partnership"… Each one becomes a button (or a choice in the menu).
Open the Manage options menu and choose Add an option...: the option's page opens.
- Category: the category where tickets of this kind are created. The Use threads button creates a private thread in the menu's channel instead.
- Emoji and Text: what is shown on the button.
- Description: a short line under the choice, only visible with a drop-down menu.
- Log channel: where the bot records tickets being opened and closed, with the transcript.
- Mentioned roles: the roles pinged when a ticket opens, to alert your staff.
- Channel name: for instance
ticket-{MemberName}to use the member's name.{TicketNumber}gives a number that goes up with every ticket, and{TicketStatus}shows ⏰, which turns into ✅ once the ticket is claimed. - Opening message: the message the member reads when they arrive in their ticket.
- Roles with access: the staff roles that see and can answer tickets of this kind. Don't forget this one, or only the member sees their ticket.
- Custom command on opening: a custom command run automatically when the ticket opens, to go further (a questionnaire, for example).
Click back to return to the panel, and repeat for each option.
Step 4: buttons or menu, and claiming
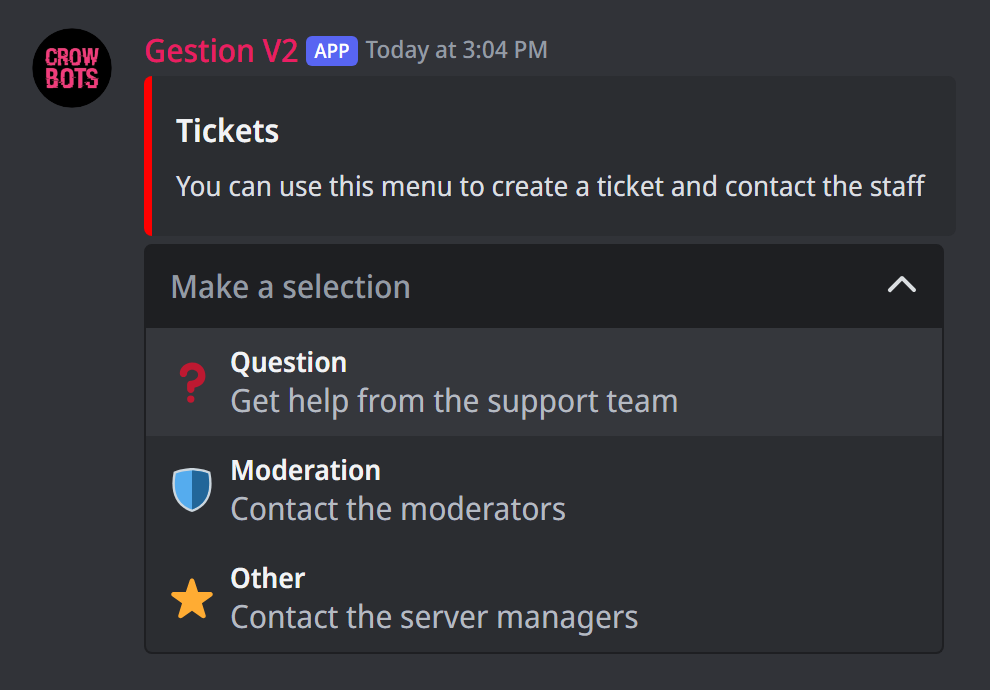
Under Type, choose:
- Buttons: one button per option, best for up to 4 or 5 options;
- Selector: a drop-down menu, tidier when there are many options, and it shows each option's description.
Claiming: who handles the ticket?
To "claim" a ticket means to take charge of it. When a staff member types +claim in a ticket (or clicks the Claim button), they become responsible for it. Under Claim, choose what then happens to the rest of your staff:
- Off: nothing, everyone can still see it and write in it;
- Prevents other moderators from speaking: they still see the ticket but can no longer write in it;
- Prevents other moderators from seeing: the ticket disappears for them.
Step 5: publish
Click Validate. The bot publishes the menu in the chosen channel (or adds it under your message) and the panel closes. Your members can now open tickets.
To change the menu later, type +ticket settings again, change what you want and click Validate again: the published menu is updated.
Several menus
The Add a panel button creates a second menu, for instance one for support and one for recruitment, each with its own options. The ↩ arrow lists your menus so you can switch between them, and the 🗑 bin deletes the menu shown.
Advanced settings
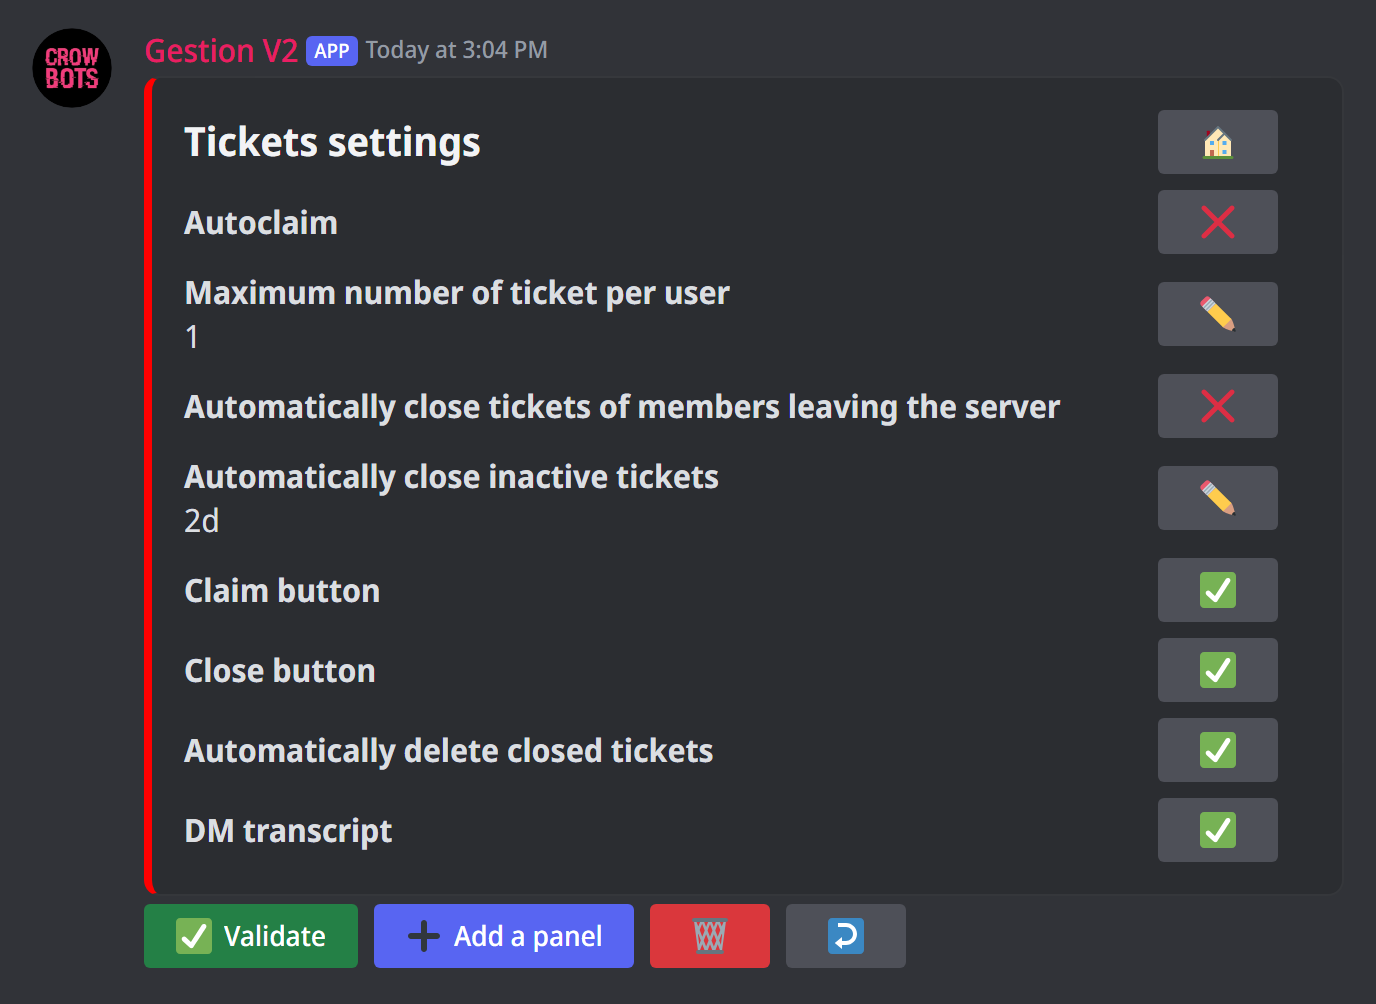
The 🔧 wrench at the top of the panel opens a second page (the 🏠 house brings you back):
- Autoclaim: the first staff member who writes in a ticket claims it automatically (only when claiming is on);
- Maximum number of ticket per user: 1 by default;
- Automatically close tickets of members leaving the server;
- Automatically close inactive tickets: for example
2dcloses a ticket after 2 days without a message; - Claim button and Close button: the buttons shown in each ticket;
- Automatically delete closed tickets: otherwise the channel stays after it is closed;
- DM transcript: the member receives a copy of the conversation by private message when the ticket closes.
Each ✅ or ❌ is a switch: click it to change it.
In a ticket: staff commands
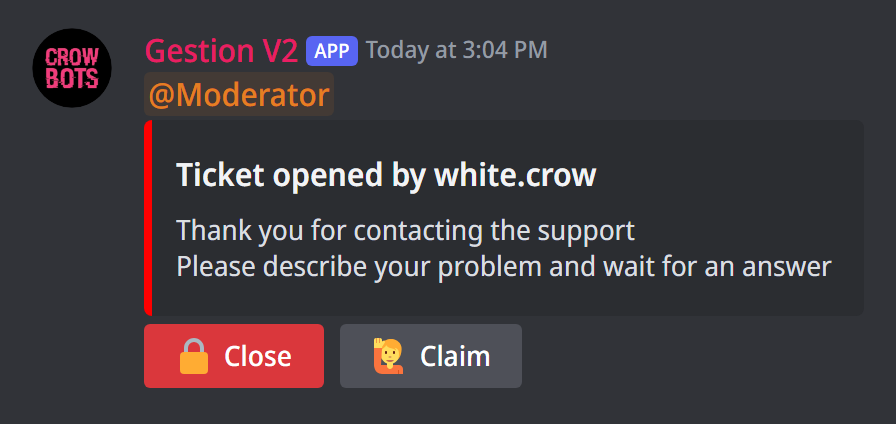
When a member opens a ticket, the bot creates the channel, mentions the chosen roles and shows the opening message with a Close button, plus Claim when claiming is on.
Inside the ticket, your staff can type:
+claim: take charge of the ticket;+add @memberand+del @member: add someone to the ticket, or remove them;+rename refund: rename the channel (Discord only allows 2 renames every 10 minutes);+close problem solved: close the ticket. The reason is optional and recorded in the logs.
Modmail: tickets by private message
Modmail is another way to open a ticket: the member simply writes to the bot by private message, and a ticket opens on your server. Your staff answer there, and the bot passes messages both ways.
Type +modmail: its menu sets
- turning modmail on or off;
- its category (Create category makes one ready to use) and its log channel;
- the roles with access, who see and answer modmails, and the roles to mention on each new modmail;
- the required and forbidden roles to open one;
- Anonymous moderators: the member doesn't see who is answering;
- Answer without commands: see below;
- automatically closing inactive modmails, or those of members who no longer share a server with the bot, and automatically deleting closed channels.
Answering the member: in the modmail's channel, type +rep (or +r) followed by your message; the bot reminds you when each modmail opens. With Answer without commands, every staff message in the channel is passed on directly, except those starting with + (the prefix then a space), which stay between you. +close closes the modmail, like a ticket.
To contact a member yourself, type +openmodmail @member: they see nothing until your first message.
One server only
Modmail works on a single server of the bot: the one its category is on.
If it doesn't work
- "It seems I cannot open ticket right now": most often, the bot lacks the Manage Channels permission. Give it to the bot's role in your server settings.
- The member can't see their ticket, or neither can your staff: check the option's Roles with access, then the category's permissions.
- Nothing happens when I type the command: your bot may use another prefix than
+, or you may not be allowed to use+ticket settings(see permissions). - "You must add at least one option" or "You must choose a channel first" when clicking Validate: an option or the menu's channel is missing.
Every command
Each command of this guide, with its arguments, its default level and examples: Tickets and modmail.