
Creating a role menu
Let your members pick their own roles, with buttons, a drop-down menu or reactions.
On this page
A role menu lets your members take some roles themselves: the notifications they want, their games, a name colour… They click a button, pick in a menu or react, and the bot gives them the role.
In short
+rolemenuopens the panel.- In Manage impacted roles, add each role with its emoji.
- Pick the channel, then click Validate the rolemenu.
Step 1: the menu's roles
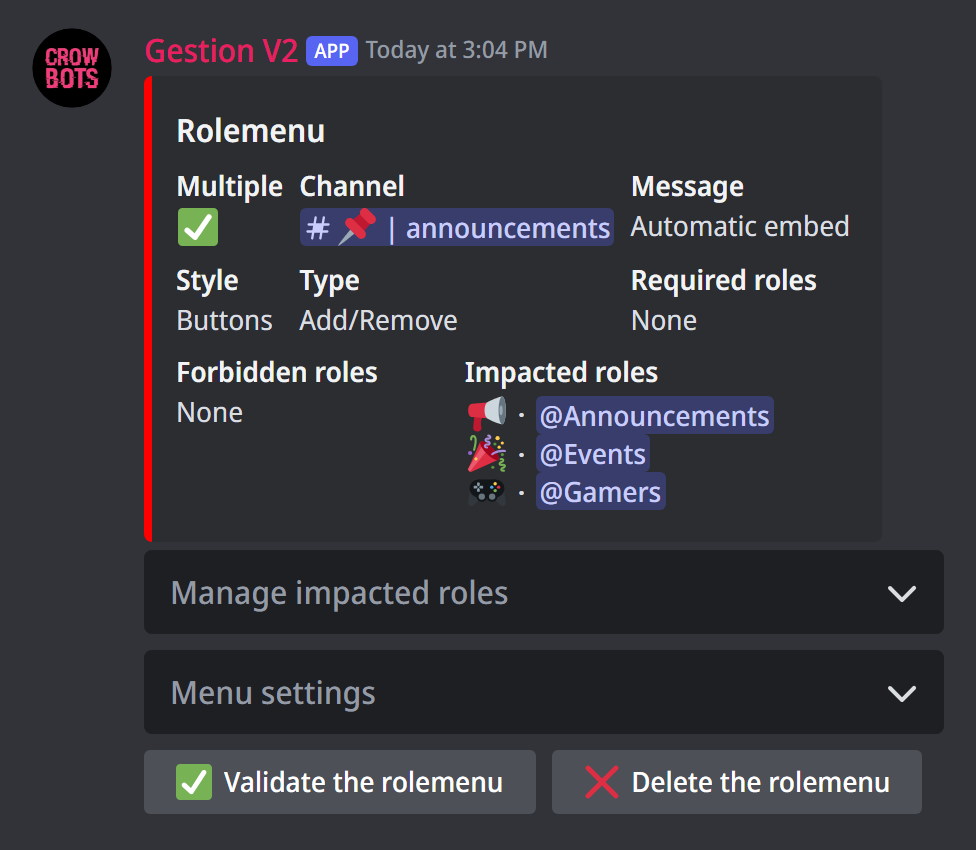
Type +rolemenu. The first menu, Manage impacted roles, lists the roles already added; Add option... adds one (25 at most). For each role, you set:
- the role to give: send its mention, its name or its ID;
- its emoji;
- its text, for a button or a drop-down menu (the role's name by default);
- its description, the small line under the text in a drop-down menu;
- its colour, for a button: blue, grey, green or red;
- its position in the menu.
Back returns to the panel, Delete the option removes this role from the menu.
The bot's role position
The bot can only give roles placed below its own in the server's role list, and you can't put a role above yours in a menu.
Step 2: set up the menu
The Menu settings menu sets the rest:
- The style: buttons (the default), selector (a drop-down menu) or reactions under the message. With reactions, each role needs its own emoji.
- Possibility of multiple roles: when Multiple is ✅, a member can take several roles of the menu; with ❌, picking a role removes the menu's other roles (handy for a colour or a team).
- The type:
- Add/Remove (the default): a click gives the role, another click takes it away (with a reaction: removing the reaction removes the role);
- Add: the menu only gives the role;
- Remove: the menu only takes the role away.
- Required roles and forbidden roles: only members with one of the required roles, and no forbidden role, can use the menu. A member who loses the required role, or gets a forbidden one, loses the menu's roles.
The channel and the message
Pick the channel for the menu, then the message that carries it:
- Send an automatic embed for the menu (the default): the bot sends a "Choose your roles" message listing the roles with their emojis;
- Use the last message in the channel;
- Choose the ID of a message: for example an embed prepared with
+embed.
Buttons and drop-down menus can only be added to a message sent by the bot. Reactions work on any message.
Step 3: post the menu
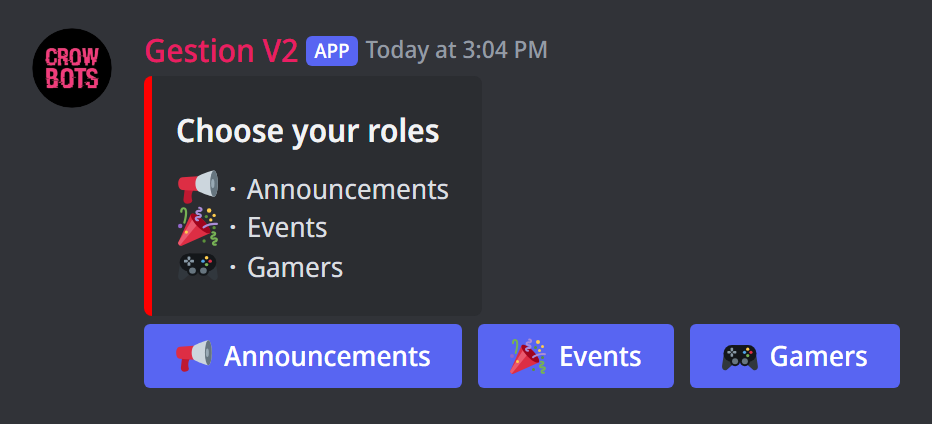
Click Validate the rolemenu: the menu is posted. Your members just have to click.
To edit an existing menu, type +rolemenu followed by its message ID (or its link): the panel opens again with its settings. Delete the rolemenu turns it off.
To verify new members
A role menu isn't meant to verify newcomers: use the security of members joining instead.
If it doesn't work
- The role isn't given: the bot's role must be above that role, and the bot needs the Manage Roles permission. A full role (
+limitrole) is no longer given. - "I am not the author": buttons and drop-down menus only go on a message of the bot; pick the automatic embed, or switch to the reaction style.
- "some roles have no emoji associated" or "several roles share the same emoji": with the reaction style, give each role a different emoji.
- A member can't pick anything: check the menu's required and forbidden roles.
Every command
Each command of this guide, with its arguments, its default level and examples: Role menus.