
Creating a custom command
Make the bot answer a word of your choice, with a message, an embed, roles or buttons.
On this page
A custom command is a keyword you make up, and the bot's answer when someone sends it. For example: a member writes !site, and the bot answers with your website's link.
A custom command can also give roles, add reactions, show buttons or open a form. It is a building block for other features too: scheduled reminders, tickets, welcoming members…
This page teaches you the essentials. Every setting and every module is detailed in the reference page.
In short
+custom !sitecreates the command and opens its panel.- In Manage modules, choose Messages and click ➕ to write the answer.
- Send
!site: the bot answers.
Step 1: create the command
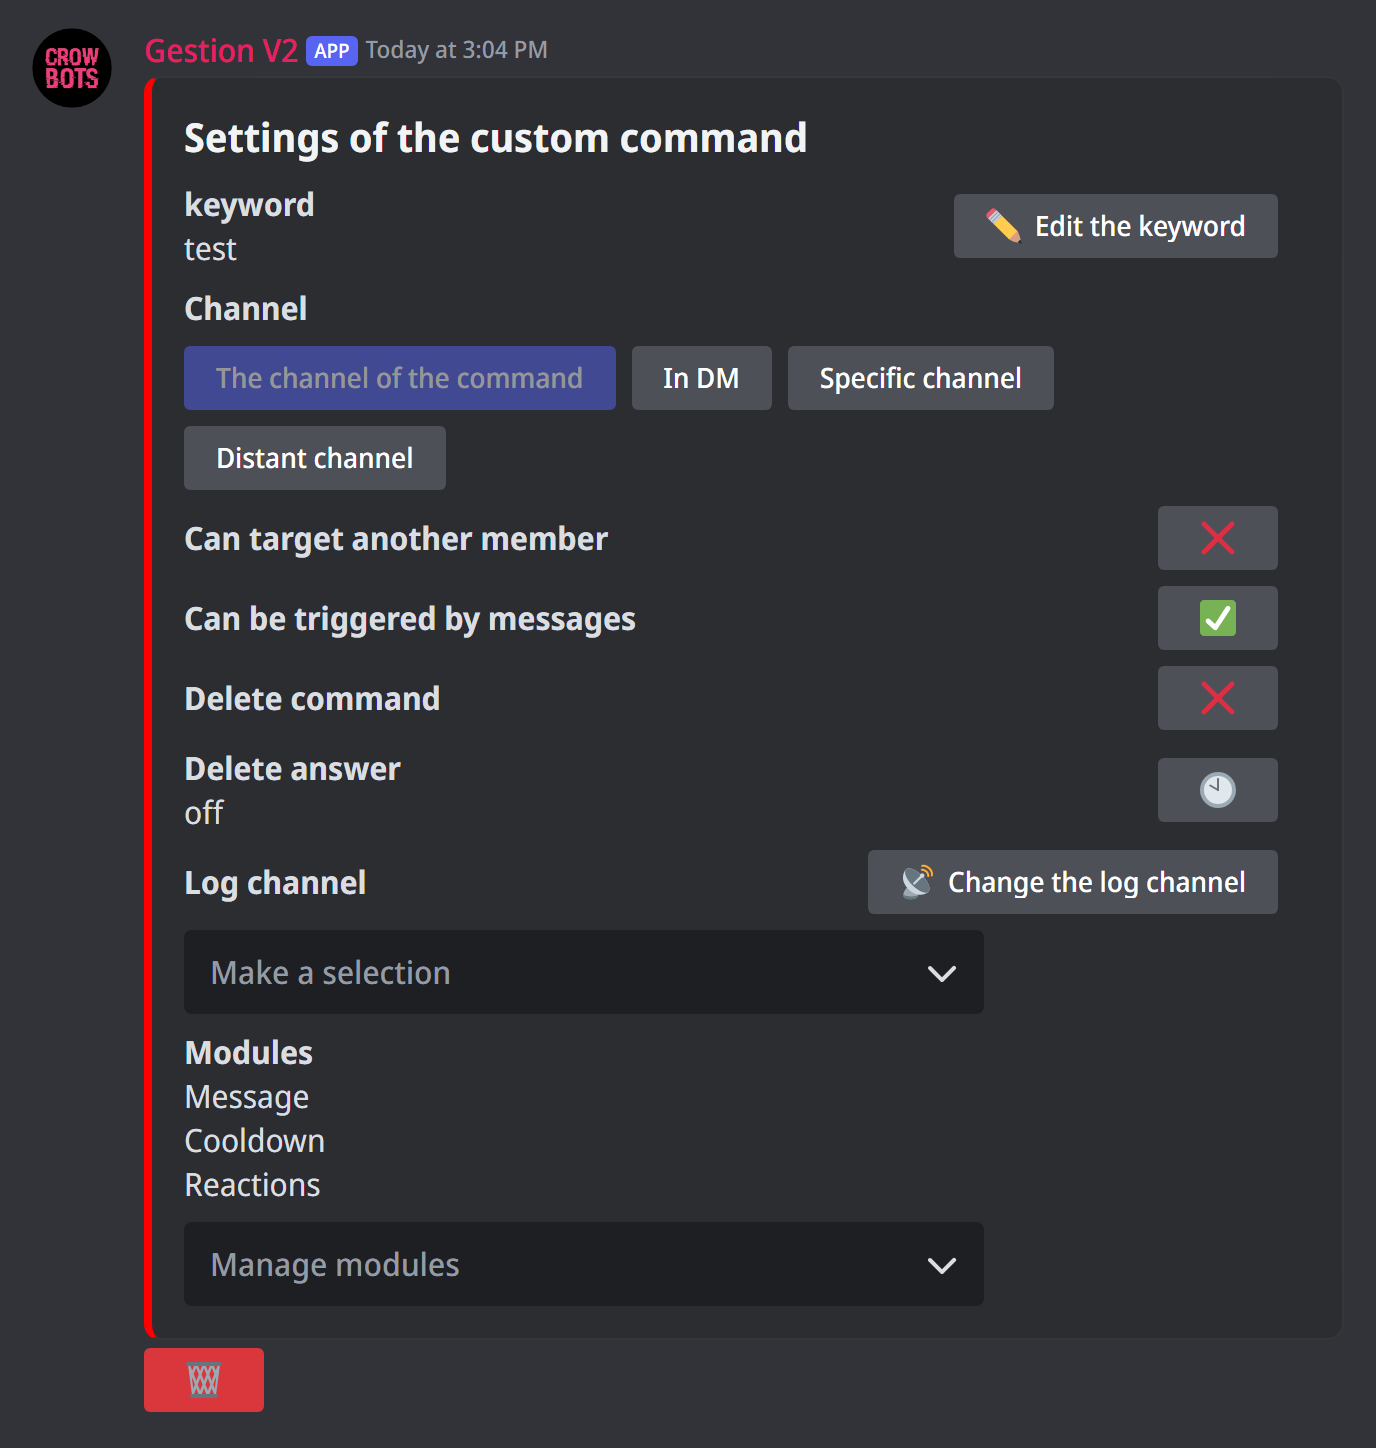
Type +custom followed by the keyword. The keyword is the whole message your members will send, without the bot's prefix. Capitals don't matter.
+custom rules: the command fires when someone sendsrules;+custom !site: it fires with!site. Put a symbol in front if you want it to look like a command.
If the command already exists, +custom followed by its keyword reopens its panel so you can edit it.
Step 2: where and how it answers
The main panel sets, among other things:
- Channel: where the answer goes: where the command is typed, in DM, or in a specific channel;
- Can target another member: with ✅,
rules @membermakes the command target that member; - Can be triggered by messages: with ❌, sending the keyword does nothing any more (for a command run only by a button, for example);
- Delete command and Delete answer: erase the member's message, or the bot's answer after a delay.
Every one of these settings is detailed in the reference page.
Step 3: what the command does, the modules
The Manage modules menu opens each module; the Back button returns to the main panel. A command can combine several. Here are the ones used most.
Messages
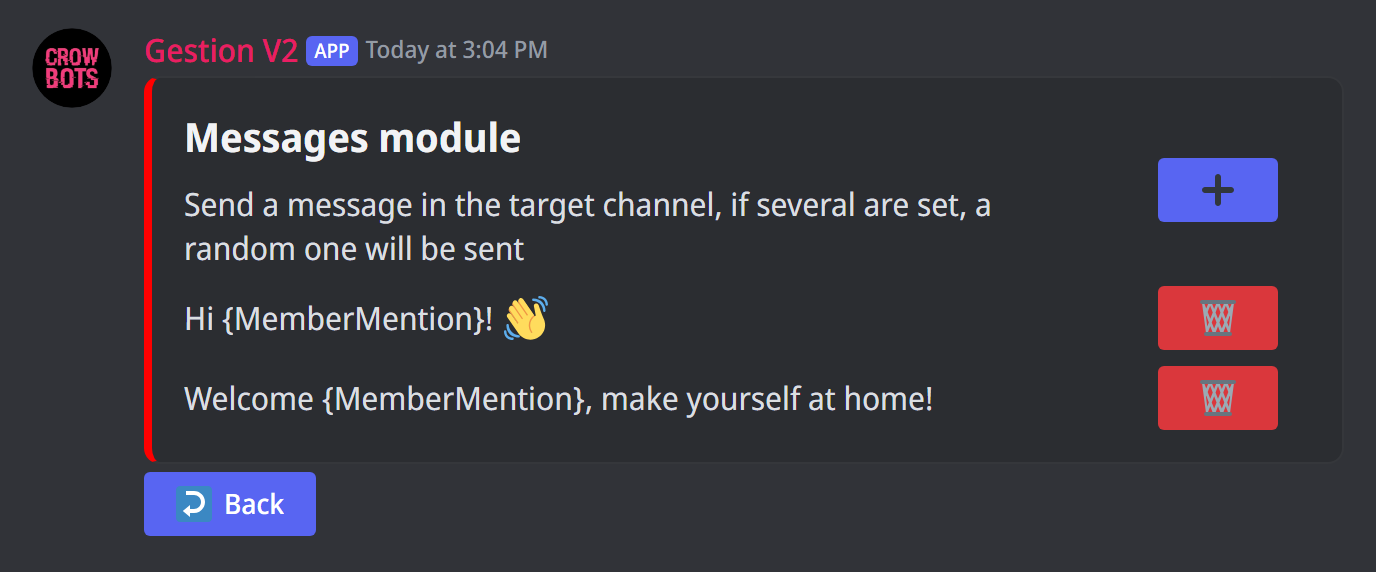
The text the bot answers. Click ➕ to add one, the bin to remove one. With several messages, the bot picks one at random each time.
Variables personalise the answer: {MemberMention} mentions the member, {MemberName} gives their name… +help msg lists them all.
Embeds
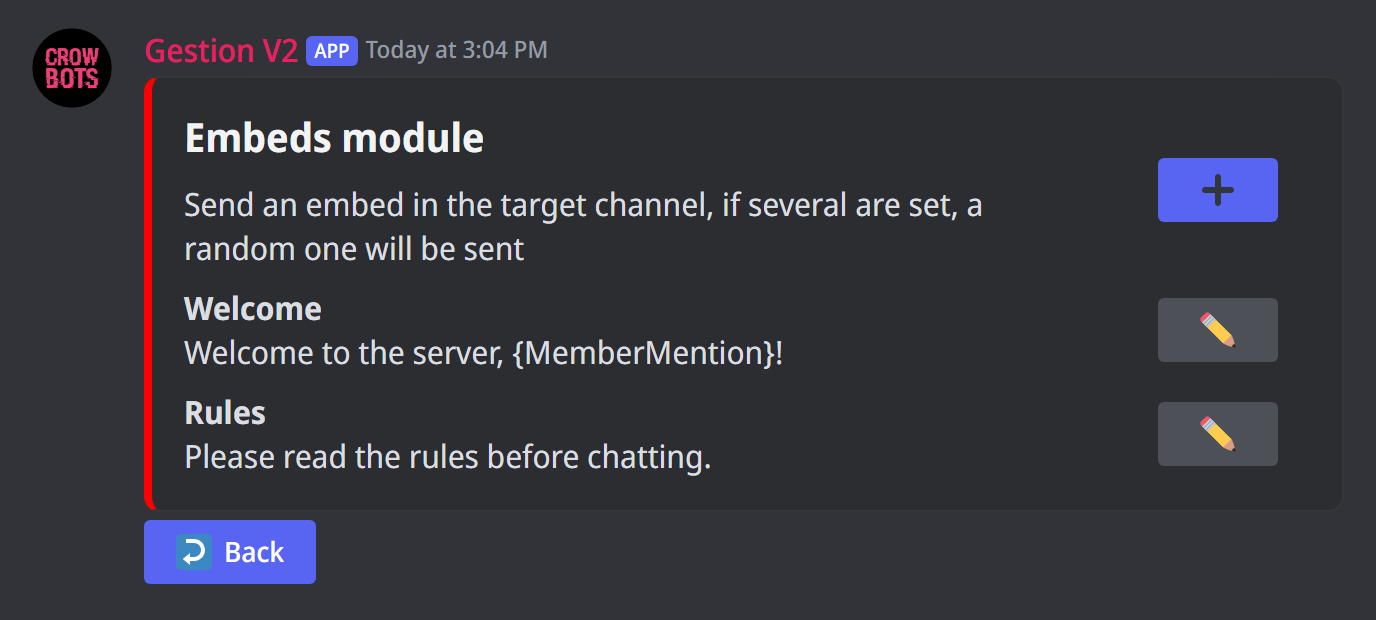
An embed is a framed message, with a title, a colour and a picture. ➕ opens the same editor as the +embed command, and the pencil edits an existing embed.
Role modifications
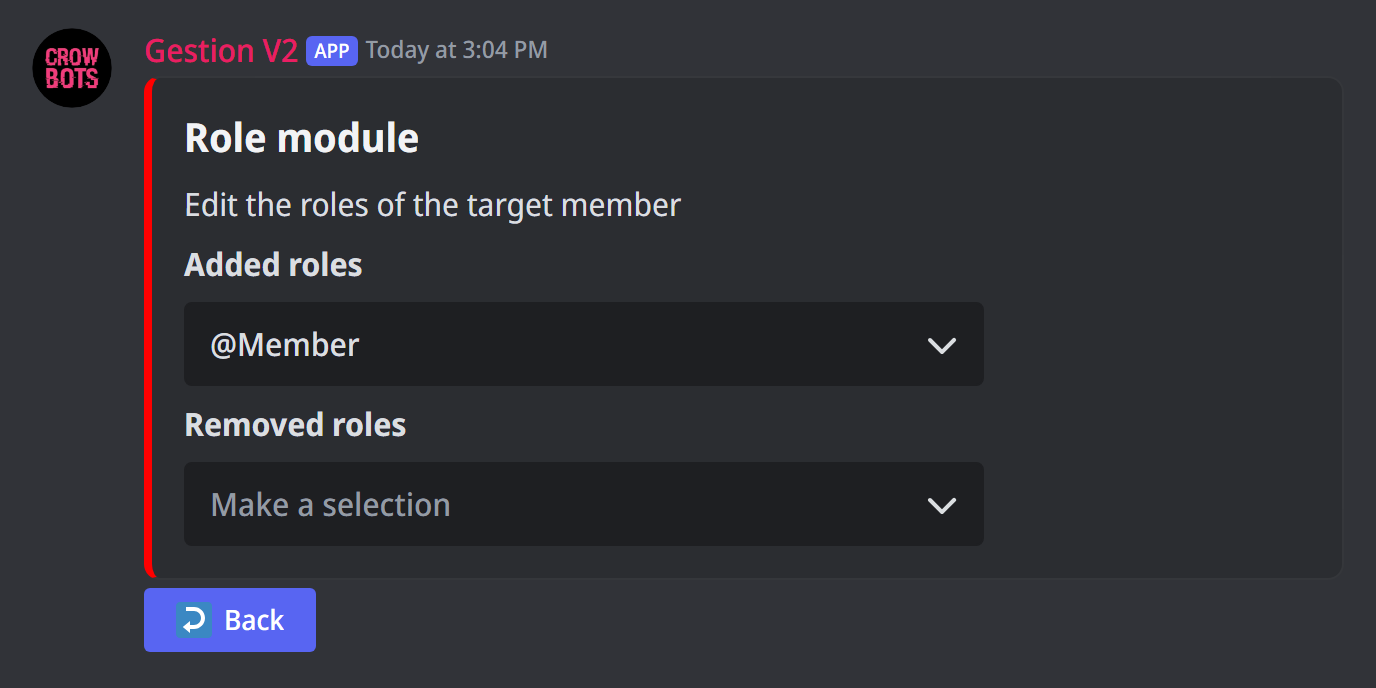
Gives or removes roles: pick them under Added roles and Removed roles. Ideal for a "Notifications" role anyone can take with a command. The bot's role must be above those roles.
Buttons and menus
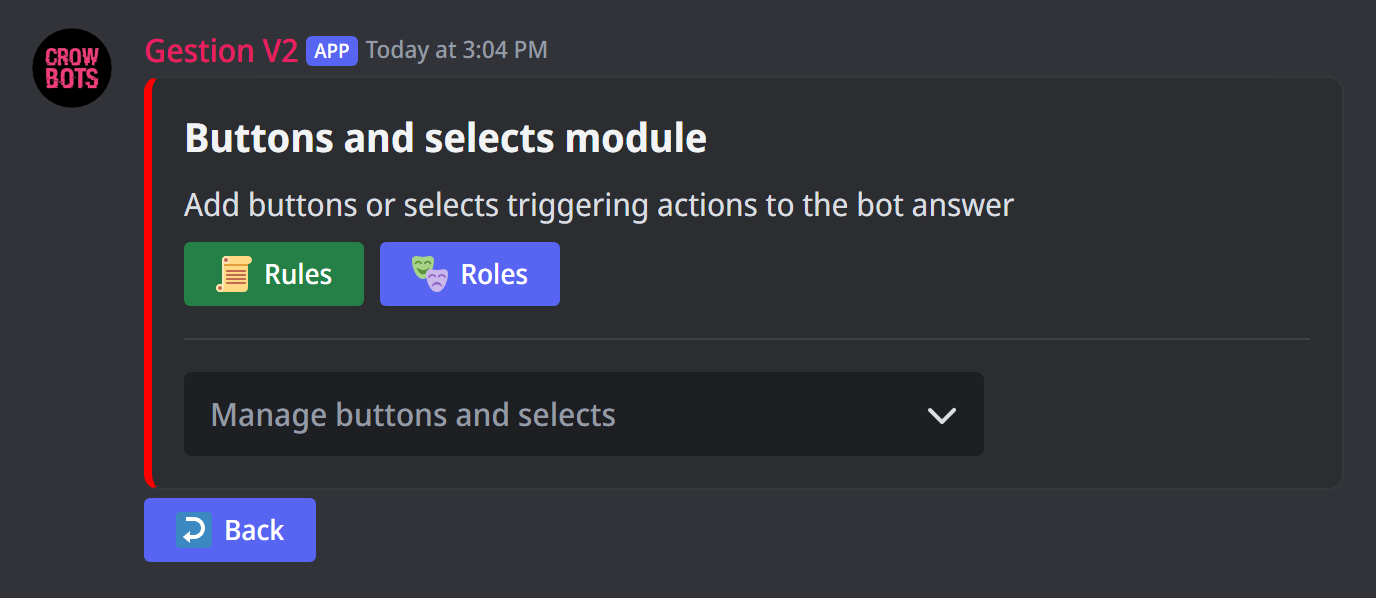
The Buttons/selects module adds buttons and drop-down menus under the bot's answer. Each button, or each choice in a menu, can run another custom command. That way you can build a role menu, a questionnaire, or even a small game.
In the Manage buttons and selects menu, choose Add a button or Add a select.
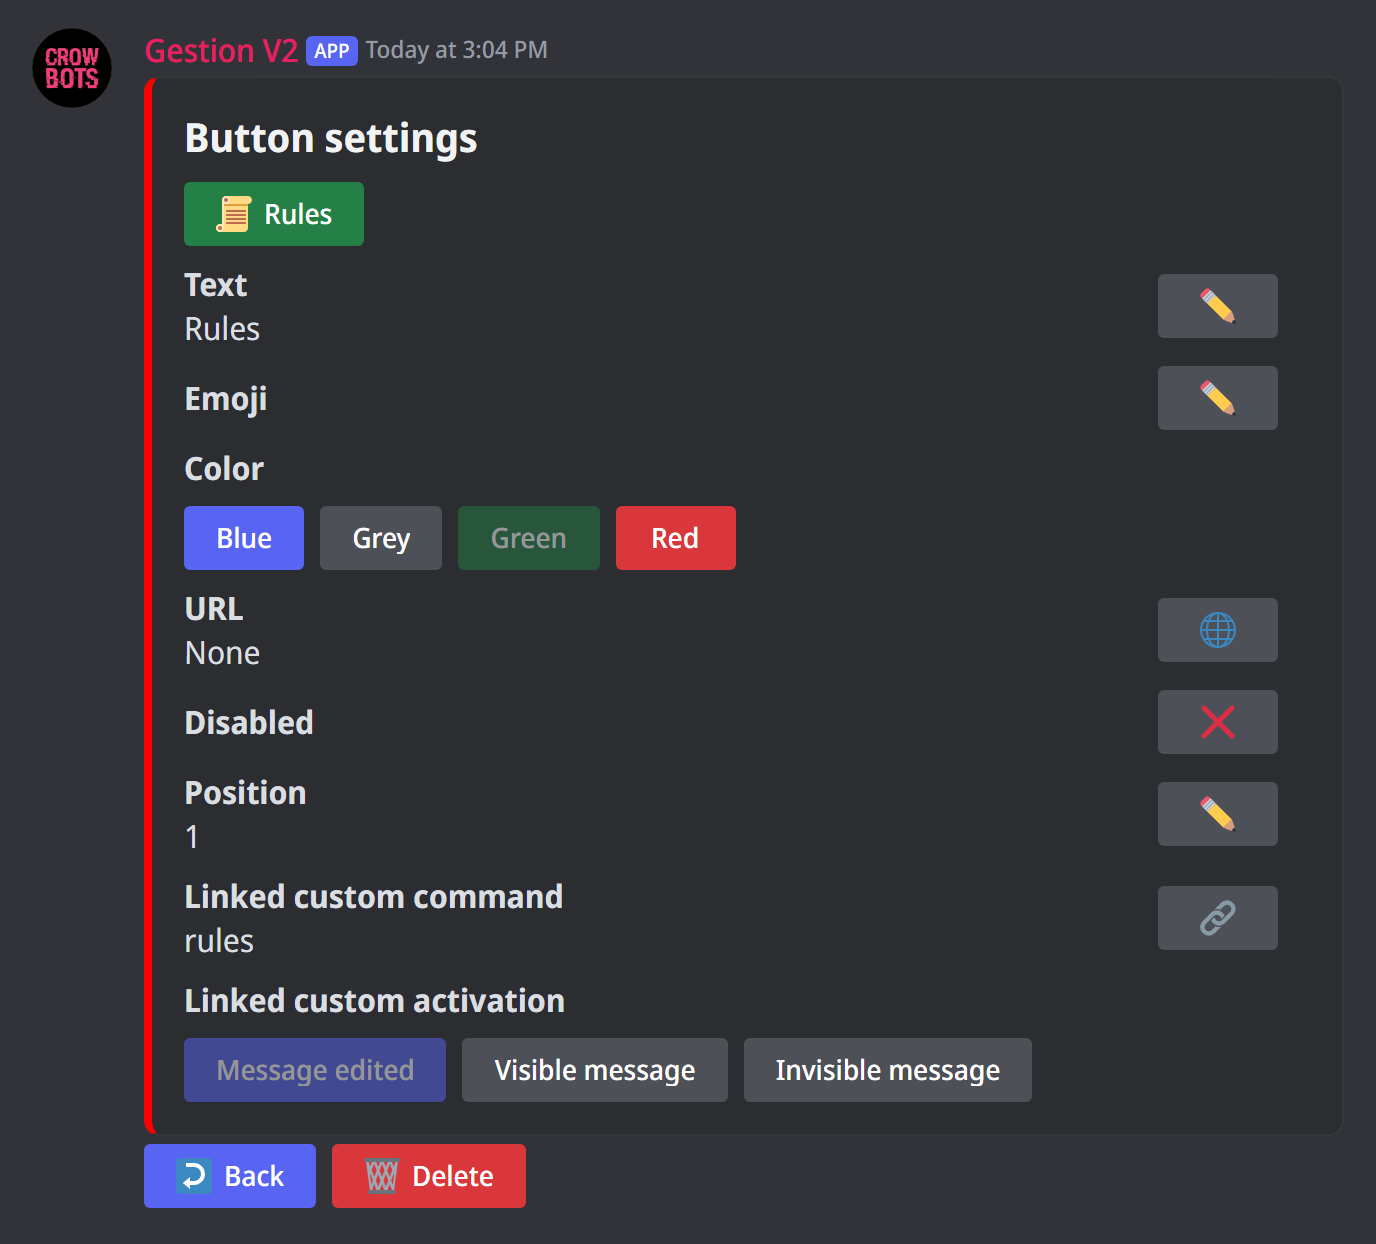
For a button, set its text, its emoji, its colour, and above all the linked custom command, the one it runs. Linked custom activation chooses how it answers:
- Message edited: its answer replaces the button's message (ideal for a chain of questions);
- Visible message: it answers in a new message, visible to everyone;
- Invisible message: only the person who clicked sees the answer (ideal for a role menu).
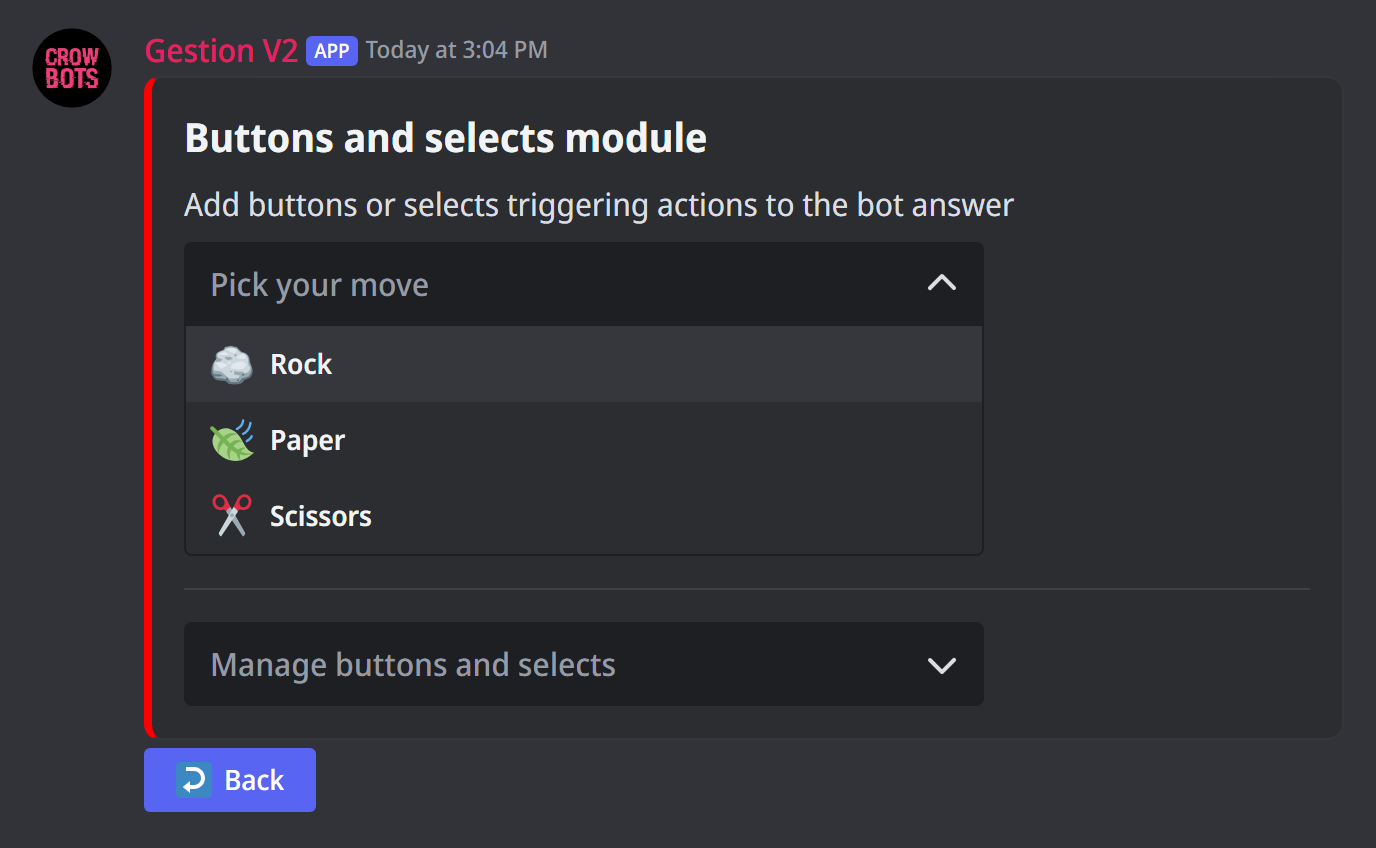
A select works the same way: each of its options has its text, its emoji and its linked command. Every setting of buttons and selects is in the reference page.
A command only a button can run
In the linked command, set Can be triggered by messages to ❌: nobody can run it by sending its keyword, only by clicking.
Example: rock-paper-scissors
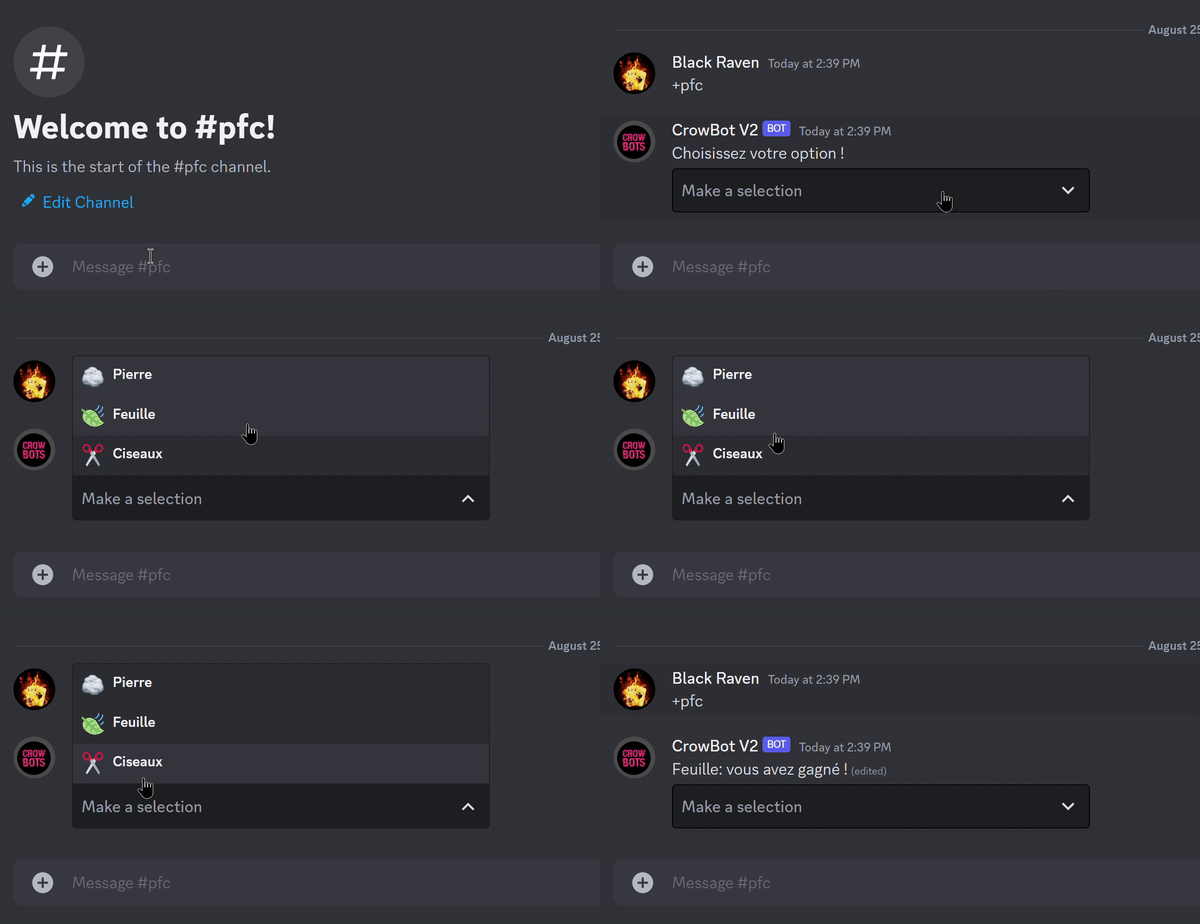
Here is a mini-game made only with custom commands:
- Create three commands,
rock,paperandscissors. Each one has several answers in its Messages module ("I played paper, I win!", "I played scissors, you win!"…): the bot draws one at random. Set Can be triggered by messages to ❌. - Create the
!rpscommand. In its Buttons/selects module, add a select with three options: Rock, Paper and Scissors, each linked to the command of the same name. - Send
!rpsand play!
Every module
The Manage modules menu offers ten. Each one is detailed in the reference page:
- Messages, Embeds and Stickers: the answer, or one of several at random;
- Role modifications: give or remove roles;
- User/role filtering: who is allowed to use the command;
- Reactions: reactions under the command or the answer;
- Cooldown: a delay before it can be used again;
- Buttons/selects: buttons and menus under the answer;
- Advanced components: a laid-out answer, with frames, pictures and galleries;
- Form: questions asked to the member before answering.
Managing your commands
+customlistshows every custom command on the server;+custom transfer 2copies a command from another of your servers (its number in+server list, or its ID);+clear customdeletes them all (cannot be undone). To delete only one, open it and click the bin.
If it doesn't work
- Nothing happens when someone sends the keyword: check that Can be triggered by messages is ✅, that the message sent is exactly the keyword, and that a filter or a cooldown isn't blocking it.
- The role isn't given: the bot's role must be above that role in the role list.
- The answer lands in the wrong channel: check the Channel setting of the main panel.
- The form doesn't open: it only opens from a button or a menu, not by sending the keyword.
Every command
Each command of this guide, with its arguments, its default level and examples: Custom commands.